Ikeda Shokuhin are located on the northernmost island of Japan, Hokkaido. They have some innovative snacks made from cashew nuts and different kinds of soy beans. The wasabi flavored black soy beans are my favorite. They have other funky flavors like barbecued shrimp, barbecued calamari, toasted soy sauce and sesame seed salt.
Their line of nut products have a smooth crisp crunchy coating and also come in various flavors. They have cashew nuts, walnuts and pistachios that come in different flavors. If you love wasabi, you might check out their wasabi flavored cashews.
They send samples to my mother every year, and I've consistently been amazed at the quality of their products and the attention to detail they pay to flavor, quality and packaging.
Ikeda Shokuhin
Fax: +81-11-811-2214
Email: info@ikeda-c.co.jp
Note: I don't have my camera with me and the photographs were taken with an iPhone.
We're in that period leading up to Christmas now and the supermarket is full of Dulces de Navidad. I bought a whole array of dried fruit, including Spanish Fig Bread, French truffles and other things and stuffed them in a box to send to Sweden. Then, I went home and decided to make Chocolate-Almond Buttercrunch Toffee.
I did some research but in the end decided to follow David Lebovitz's recipe because his recipes always work, and I can tell you I wasn't sorry I did. It was very easy to make and as long as you have a candy thermometer and didn't fail chemistry (and it's not one of those bad candy days) I think you'll be fine.
I used 100g of hazelnut and 100g of almonds in mine. Other than that I followed the recipe to a tee.
I found this recipe on Elra's Baking. Elra, unlike me, is a masterful baker. You can see real skill in her creations. Usually her recipes are somewhat complicated, time consuming and/or take real skill, but this time she had something pretty easy to share with us mere mortals, so I decided to try making it. If you're interested in reading up a bit more on this kind of bread you might visit David Lebovitz's page here. It may not be the most informative article about this kind of bread, but I like his story telling skills. He can make just about anything sound interesting and relevant to you.
Unlike Elra's gluten free version, I used regular AP flour and whole wheat flour. I bought 6 oranges and spent yesterday afternoon slaving in the kitchen, making candied orange peels. I'd have to say this was the hardest part of this recipe. However, as I have learned, home made candied orange peel or lemon peel is just so much nicer so I went the extra mile. Not only that. In Spain where I live, the cost of 6 oranges is under 2 euros and 1 kg of sugar is something like 0.70 euros. Basically, if you choose to slave in the kitchen instead of taking the easier way out you get about 2 cups of beautiful candied orange peel bursting with flavor for under 3 euros. In the spice bread, I used raw brown sugar instead of 'molasses + brown sugar' as I couldn't find any of the former, and I omitted the orange flower water as I felt it was an artificial flavoring this mix didn't really need.
Since Elra noted that you needed to let the bread sit overnight or if you can manage to restrain yourself, for 3 days, I made the loaf late last night so that I could have a slice this morning.
Perhaps because I didn't chop the orange peel finely enough, they appeared to sink to the bottom of the batter and created gaps at the bottom of the loaf, but this didn't detract from the wholesome spicy aroma of the bread. When I bit into the loaf, the burst of the spices and freshly made candied orange peels made all the slaving worth it. I still have more than 1/2 cup home made orange peel left so I'm definitely going to make this again.
Pain d’épices - Honey Spice Bread from Burgundy - Adapted from ~ Elra ~
Ingredients
1 Cup AP Flour 1 Cup Whole Wheat Flour 1/2 Tbsp Baking Powder 1 Tsp Baking Soda Pinch Salt 1 Tsp Cinnamon 1 Tsp Ginger 1/2 Tsp Cloves 1/2 Tsp Nutmeg 1/2 Tsp Anise 1 Cup Honey* 1/2 Cup Raw Brown Sugar 1 1/2 Cup Whole Milk 1/2 Cup Candied Orange Peel
*I used a thick dark honey from Galicia. I suggest using orange flower honey to enhance flavor, if you can get this in your area.
Step 1: Warm the milk, honey and brown sugar over low heat until everything has dissolved. Set it aside to cool
Step 2: When the liquid mixture above has cooled, preheat the oven to 176 C (350 F).
Step 3: Mix all the dry ingredients except for the orange peel. Put everything in a big bowl and use a beater to beat it all up if you are lazy about sifting ingredients.
Step 4: Mix the wet ingredients into the dry ingredients. Mix it just so that you don't have any clumps of flour in the batter.
Step 5: Stir in the chopped orange peel and pour into a buttered, paper lined baking mold.
Step 6: Bake in the oven for 45-55 minutes.
Step 7: Leave in the mold for 10 minutes then remove from the mold and let it cool to room temperature.
Step 8: Wrap it with the paper still on in aluminum foil and let it mature overnight or for 3 days.
Step 9: Make yourself some coffee or tea and enjoy!
Note: Speaking of candied orange peel this guy has really made beautiful ones.
When I hear this word, my mouth waters ever since I found Taste of Beirut. I never realized how much I loved Lebanese food until I found this blog. Everything I've tried has been divine.
As I've mentioned before, I'm not a big vegetable lover and I'm always looking for new recipes that will make me say: Ooooh I love this and I want to eat more! This is such a recipe. Need I say more?
I have listed the ingredients and given you a quick version of how to make it, but please go here for further details. I also recommend you visit Taste of Beirut, because there are so many other mouth watering recipes to be discovered there. One of my absolute favorites is the Shrimp in Cilantro & Garlic Sauce.
Braised Cauliflower with Tarator Sauce Lebanese Style- From Taste of Beirut
Ingredients
1 Head of Cauliflower
3 - 4 Lemons = 1/2 Cup Lemon Juice
1/2 Cup Tahini (8 Tablespoons)
1/2 Cup Water
6 Cloves of Garlic
Olive Oil
Sea Salt
Parsley
Step 1: Cut the cauliflower into florets and then braise them in olive oil until golden brown, lightly salting them as you braise them. Leave them to cool to room temperature.
Step 2: Put the lemon juice, water, garlic and Tahineh into a food processor and blend until it's a nice soft cream the consistency of mayonnaise. Salt to taste.
Step 3: Serve the cauliflower with the sauce. Dip and eat.
I still remember with fondness those days when I had just been married in my mid-twenties, and my sister was Director of Japanese Programs at the Sheraton Waikiki. If I close my eyes I can almost see the sunlit Surf Room of the Moana Surfrider with their lovely lunch buffet of a myriad delights, and I can almost hear the low din of happy people on holiday, with waiters and waitresses weaving through the tables neatly covered in pink and white cloths, with their pitchers full of iced tea with pineapple juice, the ice cubes lazily clunking around inside them.
The Waikiki area is a perfect beach resort, almost like a chapter in Disneyland. It's very rarely that you see things tourists don't want to see. Everything is clean and well-ordered and panders to the perfect holiday on a tropical island without some of the more unpleasant 'reality' of the tropics. You don't really notice the presence of mosquitoes or fungus growing in all manners of places, and you don't see the telltale signs of bad maintenance like chipped tiles and broken fences that you often see in many tropical areas.
The other day I was looking for a recipe with glutinous rice. This was because I had purchased some to make Puto, a Filipino steamed rice cake, and then after finding out that the recipe didn't really produce the results I wanted, I decided to look for other ways to get rid of the rest of the glutinous rice flour. This was when I came across the word 'Butter Mochi'. Someone mentioned it in the comments of a blog explaining how to make Mochi, saying that it tasted nothing like Butter Mochi and that she was terribly disappointed.
I don't think I've ever had Butter Mochi. Even though when I'm in Hawaii, the locals think I'm a local (Japanese American) who has had a 'mainland education', I don't know that much about Hawaii, and I really don't think I've ever had Butter Mochi.
I kept the recipe lying around for days unconvinced whether I should try making it, until finally I thought: What the hell. I might as well make it, because this bastardized version of Mochi is kind of like a Japanese American and kind of like me. Although some sources speculate that Butter Mochi is a bastardized Bibingka (another Filipino rice cake) meets Portugal, I don't think it's anything like Bibingka. Whatever Butter Mochi is, I feel it's more like an accurate representation of the Hawaiian brand of East meets West. I mean if a lot of the immigrants had glutinous rice flours lying around their homes, wouldn't someone there have just come-up with this one day when they suddenly needed to bake a cake for some guests, but didn't have any ordinary wheat flour lying around? Let's just throw in the rice flour and lots of eggs and butter because rice flour isn't going to get fluffy!
So here it is. The original recipe is from here, but these are the proportions for a smaller baking pan.
Butter Mochi
Ingredients
312g Glutinous Rice Flour
342g Sugar
1 Tsp Baking Powder
81g Melted Butter
486 ml Whole Milk
4 small-medium eggs (3 if large)
1 Tsp Vanilla Essence*
Nearly 1 Cup Dessicated Coconut Flakes
23 cm x 23 cm Baking Pan <---Turned out to be too small. *I used my home made vanilla essence made with vodka and vanilla beans. I followed this recipe.
Step 1: Preheat the oven to 175C (350F).
Step 2: Mix all the dry ingredients in a big bowl with a beater so that it's well-mixed.
Step 3: Beat the eggs in a smaller bowl. Add the milk and vanilla essence.
Step 4: Pour the wet ingredients into the dry ingredients and mix well.
Step 5: Pour in the melted butter and dessicated coconuts.
Step 6: Pour the batter into a buttered baking pan and bake in the oven for 1 hour.
Step 7: Remove from oven after 60 minutes or when the top of the Butter Mochi is golden brown, and cool completely before cutting into squares and serving.
Step 8: Enjoy!
While this was baking, my apartment was filled with the sweet aroma of sugary coconuts and vanilla. I'd say it's a happy smell. The best part about the Butter Mochi is contrast of the crispy coconut crust on top and the chewy layer of Mochi beneath it. I think when I make this again, I'm going to use a much larger baking pan so that there's more crispy coconut.
Notes: Around 35 minutes into baking this, I walked over to the oven and took a peek to see how things were coming along. It turns out the baking pan was too small and the Butter Mochi had puffed up like Yorkshire Pudding or Dutch Babies. Lesson learned. Please use a larger baking pan than 23 cm x 23 cm. I'll give this another go and post the ideal size.
This is my first attempt at making Besam Paare (Spicy Indian Crackers). For the recipe, please go here.
I have memories of eating very delicious spicy home made crackers at a neighbor's house when I was little, and I had a craving for them. I'm not sure if Manjula's recipe is exactly the same, but I think these are similar to the ones I remember eating. It could be the flavor of carom seeds and lentil flour that bring back memories.
I had a nice relaxing afternoon with a teapot of sweetened cardamom tea, eating these and just staring at the Mediterranean sea.
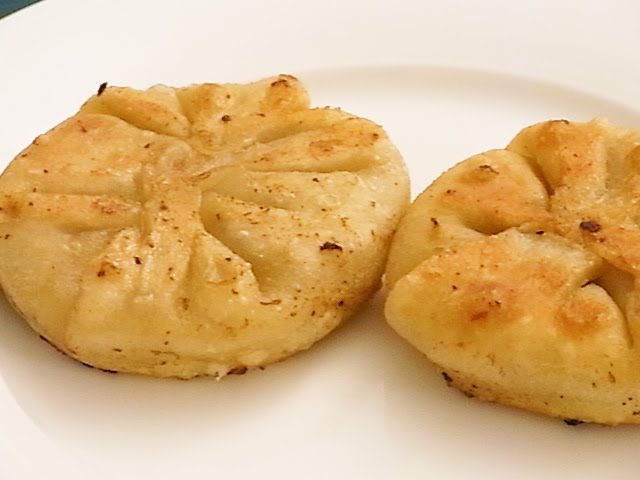
This isn't the greatest photograph of these delicious treats, but I'm going to post it anyway because I have been very remiss about my blog.
The recipe comes from Yohana's Culinary Journey and we made the wrappers and filling pretty much according to her recipe with only one omission. In her blog, these are called: Fried Beef Stuffed Pie.
We had these with home made Hong Yu (Chinese Chili Oil). We made the kind of sauce used for certain kinds of boiled dumplings in Chengdu and modified it a bit. Normally I would have garnished them with fresh cilantro, but it's way too warm in Spain now for cilantro which is after all a winter crop, so we had to do without them.
Basically we made the wrappers according to Yohana's instructions and made the Hong Yu according to Chef Wang (?)'s recipe. We cheated a bit. I didn't use a thermometer.
1. I let the oil heat-up, then transferred it to a pyrex bowl. 2. I put the pieces of crushed ginger in and waited for the furious bubbling and sputtering to calm down. 3. I put the star anise in there. 4. I put the 1/3 cup ground chili flakes in there.
This is supposed to mature for a few days but we used some a few hours later. The oil does improve over the course of a few days so if you really want to get it right, I'd make it in advance. I don't bother transferring it to any bottles but keep it in a pyrex bowl with saranwrap strapped over it. It will keep at room temperature for a few weeks.
We then made the filling and wrapped them up and steam fried them according to Yohana's instructions.
Do please go to her webite for details. I am just going to note the changes we have made in her recipes or Chef Wang (?)'s recipes below. If I haven't noted anything, I followed the recipe to a tee:
Our Adapted Version of the Sauce:
1 Tbsp Chili Oil 2 Tsp Soy Sauce 1 Heaping Tsp Brown Sugar (2 Tsp Chicken or Pork Stock)* 1 Small Clove Garlic (crushed) Roasted Sichuan Peppercorn (hua jiao) (Ground)
*Omitted. We didn't have any home made pork or chicken stock available and did not want to ruin it with commercial bouillon cubes.
Our Adapted Version of the Stuffing for the Fried Beef Stuffed Pie:
1 Portion Hot Water Blanched Dough 250g Ground Beef 1/4 Leek (Chopped Finely) 1 Small Piece Ginger (Grated) 50g Celery (Chopped Finely) 2 Tbsp Soy Sauce 2 Tbsp Dry Sherry (Alfonso Oloroso Seco Palomino) (1 Tsp Chicken Broth Extract)** Salt (to taste) 1Tbsp Dark Sesame Seed Oil
**Omitted for the same reason as the sauce.
I would suggest you garnish the pies with chopped leeks (or scallions if you have them) and cilantro if you have any. It's way too warm in Spain now for cilantro.
NOTE: Please be very careful when handling hot oil and chili flakes. Make sure you have good ventilation and people and pets are out of the way. I couldn't stop sneezing for a minute even though I was careful. Also, remember to keep an eye on the oil when it's heating-up. Do not answer telephone calls or door bells when you are heating up oil.
Ronny is on summer vacation now and he decided to make these. It's one of those things about being an expatriate. Sometimes it's not that easy to buy foods you used to eat at home so you learn to make a lot of things from scratch!
Pirog originate in Ukrania and are popular in Sweden. Most people buy them frozen, but there's nothing like the wonderful aroma of a freshly baked pirog. Spelt flour is used in making them commonly, but we used rye flour in ours.
Pirog
Ingredients
Pastry
50 g Unsalted Butter 5 dl Whole Milk 25 g Dry Yeast 1 dl Rye Flour 11 dl AP Flour 1 tsp Salt 1 tsp Sugar
Egg Wash
1 Egg
Filling
250 g Ground Beef 200 g Mushrooms (Chopped) 1/2 Onion (Chopped) 1 Rib Celery (Chopped) 2 Carrots (Chopped) 1 Clove Garlic (Chopped) 2 Tbsp Extra Virgin Olive Oil Salt & Pepper 2 Tsp Cumin Shredded Cheese
How to Make the Pastry
Step 1: Put the yeast in a plastic or glass bowl.
Step 2: Melt the butter and add the milk and when it's finger warm, add it to the yeast. Mix this together to blend.
Step 3: Add the salt and sugar and blend.
Step 4: Add the wheat and rye flour and mix it until it resembles a soft sticky dough and let it rest for 40 minutes. Cover the bowl with a clean towel or wrap.
Step 5: Knead the dough for a few minutes on a floured surface.
Step 6: Roll out the dough and cut it into circles with an inverted bowl around size of a rice bowl.
How to Make the Filling
Step 1: Heat-up the olive oil and braise the meat for awhile.
Step 2: Add all the other ingredients and braise them until the mixture is dry.
Assembly
Step 1: Put some of the meat filling and cheese onto the wrapper and fold it over sealing it.
Step 2: Take a fork and seal the edges tight.
Step 3: Brush them with the egg wash.
Step 4: Bake then in an oven preheated to 225 C on the lowest rack for 14-16 minutes until they are golden brown.
To those of you unfamiliar with US English: No, I have not turned into a cannibal and made pancakes with Dutch babies. I am not sure what these are called in Europe but they are commonly referred to as 'Dutch Baby Pancakes' in the US.
I was going to make the recipe from CHOW when my friend Christina Busch gave me a simpler alternative.
Christina squeezes fresh lemon over the Dutch Baby Pancakes to deflate them and recommends serving them with peaches. I have served mine with an orange sauce made from fresh Spanish oranges.
Dutch Baby Pancakes - Christina Busch
Ingredients - The Pancake
1 Cup Flour
1 Cup Whole Milk
4 Eggs
100 g Unsalted Butter
Ingredients - The Sauce
3 Oranges (peeled, sliced and seeded)
1/2 Cup Brown Sugar
60 g Unsalted Butter
2 Tbsp Cointreau
Step 1: Preheat oven to 220C or 425F.
Step 2: While it's preheating beat the eggs and then pour in the milk.
Step 3: Mix the sifted flour into the mixture and let it sit.
Step 4: Once the oven is preheated put your pan into the oven and let it heat for at least 5 minutes.
Step 5: Melt the butter in the pan and then add the batter and put it back in the oven for around 20 minutes. If it's still pasty white after 20 minutes, leave it in for a few more minutes, no more. Once it starts browning it goes fast!
Step 6: While the pancake is baking, make the orange sauce. Melt the butter in a sauce pan and then add the brown sugar and wait until bubbly.
Step 7: Add the orange slice and sprinkle Cointreau over them and simmer until the pancake is ready occasionally turning the orange slices in the pan carefully so as not to break them.
Step 8: Pour the orange sauce over your pancake and serve.
I am officially a fan of Ligurian olive oil and Taggiasca olives.
After eating a rich, tasty, hearty rabbit for dinner yesterday, I wanted something light for brunch and made rice salad with leftover Jasmin rice.
The thing is, when I drizzled some of the Ligurian extra virgin olive oil onto the rice, tossed it around a bit and tasted it, it was...wonderful! It felt like a violation to put anything else into it as a matter of fact.
I hesitated to add any other ingredients for fear of corrupting the lovely flavors which for some reason reminded me of stepping onto a layer of virgin snow.
I added some Taggiasca olives first and some salt, and tasted it again.
So far so good.
Then I added some ripe red cherry tomatoes I picked-up at the market yesterday as well as some thinly sliced red onions.
Then I added some chopped basil.
Still really nice.
Then I got more daring and added some tuna, because this is what goes into these kinds of salads usually.
It was tasting all very good and then I wondered about adding lemon juice.
Would this be too strong?
I only added a few drops and tossed the salad around.
Got more daring and ground some black pepper on top.
To be a purist, you'd need to procure tuna packed in Ligurian olive oil, but even with this shortcoming, the rice salad still tasted great.
Jasmine Rice Salad with Taggiasca Olives & Ligurian Extra Virgin Olive Oil
Ingredients
Leftover Jasmine Rice Ligurian Extra Virgin Olive Oil Taggiasca Olives Red Onion Tuna Cherry Tomatoes Fresh Basil Leaves Lemon Juice Sea Salt Black Pepper
This is a leftover recipe and there are no steps to be followed, but I would suggest tossing the rice with the olive oil first, and then adding the other ingredients. I prefer to put the basil in last because it can get bruised and discolor. The amount of each ingredient is left to the discretion of the cook as some people prefer a stronger onion flavor, stronger lemon flavor and so on. However, if you want to retain the lovely taste of the olive oil, it's advisable to use as little as you can (except for the Taggiasca olives of course!).
This is a typical Ligurian recipe.Water or clear broth is more commonly used rather than wine. Vermentino wine is used only in western Liguria. According to Samuele, there are two different schools regarding what kind of wine should be used:Vermentino (white) or Rossese of Dolceacqua (a young red wine similar to the Pinot Noir). This recipe is known as "Coniglio alla Sanremasca" (Sanremo-style Rabbit) and is very well-known in the Riviera di Ponente (western Ligurian Riviera). I used a dry white Spanish table wine in my first attempt, but will be experimenting with other dry whites in the future. Since we're talking about reducing half a liter of white wine, the taste of the wine isn't a hidden flavor but comes to the fore in this recipe.
Last but not least, fresh thyme is mandatory for this recipe, and more important than rosemary, as these herbs grow wild in the Sanremo hillside and are used abundantly in local cuisine.
1 Glass of Extra Virgin Olive Oil (preferably made from Taggiasca olives too)
2 Big Potatoes (Roasted in Foil)
1 Cup Home Made Beef Broth (Optional)***
Serve with:Diced Roasted Potatoes Flavored with Rosemary, Garlic, Salt & White Wine.
*Preferably from West Liguria or Sardinia.However a dry white wine should work.
**Olives should be small and sweet.They should be the kind that you find preserved in brine and not the oil cured type.Samuele says he uses about 25 olives which is much more than 2 Tbsps. I used 25 olives in mine.
***If you don’t have home made beef broth, use more wine.Commercial bouillon cubes will ruin the delicate harmony of flavors.
Step 1:Ask your butcher to chop the rabbit up into 8- 10 pieces and cook half or it or however much will fit into your clay pot.I am assuming most of you will not have the courage to do this yourself….or you might not have the kind of knife that can do this.Remember to ‘save the liver’ (I am quoting Dan Aykroyd impersonating Julia Childs here)!
Step 2:Braise the rabbit pieces over high heat in a non-stick frying pan for about 10 minutes.The objective here is to cauterize the meat on the outside to seal some of the juices in whilst getting rid of any excess meat juices.The meat should look somewhat ‘compact’ when they’re done.
Step 3:In a food processor, mince the onion, celery and carrot...or chop it up manually like I did.
Step 4:I was told to smash the garlic cloves (still in their skin) with my fist, but I did it with the sides of a knife because I have small delicate hands.If you have nice big fists, by all means please do this with your own fist.
Step 5:Put the extra virgin olive oil with the rabbit meat, onion, celery, carrots and garlic, in a clay pot and braise them on your stove top.I’m guessing that unlike in the first stage where you need to seal the meat juices in, we want to do this now over a slightly slower fire.However, do not lower the heat yet. Keep the heat reasonably high until the morsels of rabbit are golden brown.While the rabbit meat is browning, chop up the rosemary and thyme finely.
Step 6:Lower the Heat.Remove the garlic and add the rosemary and thyme as well as the dry white wine and the liver.Add some salt, cover the clay pot and keep it simmering for about 40 minutes, slowly turning the meat sometimes.
Step 7:Add the pine nuts and olives.Continue simmering and turning the meat for awhile.If the white wine has evaporated you should add some home made beef broth.If not, add more white wine.
Step 8:Remove the liver, chop it up and then return to the clay pot.You won’t be covering the terrine or frying pan after this point and you will be continuously stirring it so that it doesn’t stick to the bottom of the clay pot until all the wine has evaporated and there is a nice glaze on the meat.
Step 9:Remove from heat and let it rest for about 5 minutes before you serve it with some diced roasted potatoes flavored with salt, olive oil, rosemary, garlic and white wine.****
****Peel and cut the potatoes and dice them up.Toss them in extra virgin olive oil, sea salt, rosemary, pieces of garlic with their skin on and crushed, and put them in a casserole lined with oven paper.The temperature depends on how crispy you want them, but I prefer to cook mine at 250C for 45-60 minutes.After roasting the potatoes for 30 minutes add some dry white wine (the same one you’ve used to cook your rabbit) and then roast them for another 30 minutes or until they look right to you.For more tender potatoes reduce the cooking time to 30-40 minutes.Add the wine after 15-20 minutes.For crispier potatoes I suggest you cook them for a full 60 minutes.
This was my first try and I can’t say I’m 100% happy with the results, but I can say wholeheartedly that it tasted very nice even though I haven't mastered this recipe yet.
A few notes...
First of all, this takes 2.5 hours to prepare so don't start roasting your potatoes until the rabbit is simmering gently inside your clay pot. You can even start preheating the oven at this point and the potatoes will be done well before the rabbit is.
I used half a rabbitas a whole rabbit would not fit into my clay pot. If one person isn't a big eater, half a rabbit will be enough for two people. The recipe will work for a whole rabbit.
I also needed to get the clay pot heated up slowly as I was cauterizing the rabbit in the frying pan. You need to heat these things up slowly or they can crack!
I threw all the ingredients into the clay pot carelessly, but I think it would be better to braise the onion, carrot, celery mixture first, and then add the pieces of rabbit and garlic to the clay pot.
I used 600 ml wine which was a little too much.It took a long time to let it evaporate and glaze over.Adjust the amount of white wine you use depending on the size of your clay pot.There should be enough to keep the rabbit simmering but there is no need to cover the rabbit with white wine. Samuele's original recipe says the cooking time is about 1 hour. I really used too much wine.
I have been remiss with my blog because I was learning to be a Game Operator, but when I was chatting with my supervisor we decided that although our work was important, there was nothing more important in life than food.
The wonderful thing about the Internet is that you can talk to people who don't even live remotely close to you. Samuele currently lives in Pisa, but he hails from San Remo, that lovely little city on the Mediterranean coast of western Liguria. Anyway he saw in my profile that I liked to cook and he told me he and his wife were really into cooking too.
We started discussing how to cook rabbit since rabbit is something I haven't quite mastered cooking. You see - even though rabbit is almost a staple in Spain and you can buy it in any old supermarket, it's not something they eat anymore in Japan. If you tried to find rabbit at a butcher in Tokyo these days, I'm not sure you could find any.
I'm not sure when they stopped eating rabbit in Japan, but in the days when there was a ban on eating anything with four legs due to religious (Buddhist) reasons, they made an exception for the rabbit and categorized it as a 'bird'. In Japanese you have special words for counting different types of things, so you wouldn't count pencils and paper in the same way. Horses and sheep are counted in a different way and so are birds. To this day, even though the Japanese don't eat much rabbit anymore (maybe they do in the countryside, but I have never seen rabbit being served there), they are still counted in the same way as birds, even though children would count them in the same way as other small four legged creatures such as dogs and cats.
There's of course the reservation about eating rabbits. I don't believe my mother ever cooked rabbit. The reality is that when you have a pet rabbit, you don't really want to think about eating any other rabbits and I used to keep them as pets. That said, I used to have a pet rooster, but that didn't stop me from eating chicken. In fact when I was a kid, fried chicken (the way my mother used to make it, marinated overnight) was one of my all time favorites.
Anyhow, I digress.
I told Samuele I didn't have much experience cooking rabbit and wasn't really impressed with the one attempt I made a few months ago. He then told me about his favorite rabbit recipe. I told him certain ingredients were impossible to get in the small coastal city of Spain where I lived. His recipe required Vermentino wine,Taggiasca olives and extra virgin olive oil from the same kind of olives. He explained that these olives produced a sweet and aromatic oil very different from the spicier oils produced in Southern Spain and I just couldn't use Spanish olives and olive oil and he'd send them to me.
Was I going to say no? No way!
When he went back to San Remo for Easter, he purchased the goods in his home town and after the busy period following the holidays calmed down a bit, packed them in a box and sent them to me. It took awhile, because for some reason post between Italy and my area of Spain have bad karma and things sent from there have almost always not arrived. I think it helped that this was sent registered mail. For example, Ilva from Lucullian Delights was kind enough to send me a packet of Creme of Tartar, but it never arrived. I think someone thought it was cocaine and stole it. I sure hope they enjoyed snorting up Creme of Tartar because the thief deserved to have Creme of Tartar up his nostrils.
I'll be cooking the rabbit dish as soon as I can find time and hopefully it will be soon.
I've always wanted to try one of Lori's recipes from Lori's Lipsmacking Goodness, but never really got around to it for a dozen reasons. However, this morning I was looking for a good pancake recipe and I found it right on her blog. Lori wrote that these were the best pancakes she'd ever had and that was enough to convince me to go through the extra hassle of pulverizing oatmeal.
Even though she wrote that the 'mix' would keep for 2 weeks at room temperatures, I still thought it was way too much for two people so I made half a batch of the original recipe. The recipe I've written below is the half recipe version.
Oatmeal Pancake Mix - From King Arthur- The All Purpose Baking Cookbook, Countryman 1 3/4 CupOats 2 1/2 Cup AP Flour 1 1/2 Tbsp Sugar 1 1/2 Tbsp Baking Powder 1/2 Tbsp Salt 1/2 Tbsp Baking Soda 1/2 Cup Vegetable Oil (I used sunflower oil)
Step 1: Put the oats in a food processor and pulverize them.
Step 2: Mix in the dry ingredients and mix in the oil.
Step 3: If you grab some of it and you can make dry balls of them in your palm, it's about right. Otherwise you need to add more oil.
Step 4: Take 1 Cup of this mixture and mix it with 1 egg and 1 Cup buttermilk (or a mixture of yogurt and milk).
Step 5: Let it sit for 10-15 minutes and make your pancakes!
I've really simplified this so if you want to read Lori's post, click here.
*The mix is supposed to keep at room temperatures for 2 weeks, though I'm not sure I'd do this in tropical climate. You can also keep it in the freezer or refrigerator in an air tight tupperware. 1 Cup of the mix + 1 Cup buttermilk & 1 egg makes 4 medium sized pancakes.
If you've already tried making Jim Lahey's No Knead Baguette, and know how the dough should look during the different stages, you can easily make it with wild yeast.
If you keep your 'starter' in the refrigerator, chances are you take it out once a week and throw away half of it, and feed it 1/2 cup flour and 1/2 cup luke warm water.
Why not make Jim Lahey's No Knead Baguettes with that half you throw out?
This is what you need to do:
Step 1: Put the starter that you would normally throw away into a plastic or glass bowl during the day and feed it 1/2 cup flour and 1/2 cup lukewarm water. Cover it with a towel and let it get bubbly.
Step 2: Before you go to bed, add flour, sugar, salt and water just like in the recipe. The amount of flour and water you need will depend on the wetness of your starter and the absorbency of the flour. Add 1/2 cup at a time and try to achieve the same consistency you achieved before when you followed the recipe with measured ingredients. You should use the exact amounts stipulated in the recipe for sugar and salt. Basically, you want to add enough flour and water until you have got the same consistency as you did when you made it with the commercial yeast and followed it to a tee. Don't be too concerned about small details though of how many grams of flour you have got in there, because I have tried making it this a few times and the baguettes always seemed to turn out right.
Step 3: Leave it out overnight like the recipe says and in the morning you'll notice that the dough has bubbled up so that there is a flat plane of dough inside your bowl. Flour your counter very generously and fold it 3 times with a spatula (I use 2 spatulas) and put it into a lightly oiled (I use extra virgin olive oil) bowl. Brush the top with extra virgin olive oil and sprinkle good quality salt over it. Cover it with a towel and leave it for 1-2 hours like the recipe says.
Step 4: Divide the dough up into 4, stretch it out just like the recipe says and embed them with goodies (cocktail tomatoes, garlic cloves, walnuts, Marcona almonds, olives, etc), brush them with more extra virgin olive oil, and sprinkle them with Fleur de Sel.
Step 5: Bake them in a preheated oven at 500F (260C) or however high your oven will go. My oven's maximum temperature is 250C and they turn out fine. I baked mine for 20-25 minutes. Baking time will depend on your flour quality and oven, so watch them and bake them until they are at least a bit brown.
It's a warm sunny day here on Costa del Sol after days and days of wet, dark, stormy days and floods. In fact, it's like Swedish summer. It's one of those breezy days filled with sunlight. There are yellow flowers blooming in the verdant fields and the sky above you is a perfect shade of blue. It's one of those nearly perfect days when you can simply enjoy the weather and be happy that you are in this place and have the time to take a walk.
It's perhaps not the ideal weather for a piping hot bowl of spicy soup, but since I already had some black beans soaking in some water in a bowl, I thought I'd go ahead and make soup anyway.
Some people like their soups devoid of texture or fiber and always use a blender and sieve, and although I do use the blender from time to time (depending on the soup), I prefer a chunky wholesome soup where the ingredients have managed to retain some semblance of their former glory.
If you're vegetarian or freaked out by bouillon cubes, just omit the beef bouillon and I'm sure it will still be fine. If you or someone in your family is freaked out by texture, you can also put the soup through the blender before serving it. Remember to remove the bay leaves and dried chilies if you're blending it, and if you are afraid that 2 chilies might be too much, use 1 chili. Well, you know the drill?
Spicy Black Bean & Sweet Potato Soup
Ingredients
2 Cups Black Beans (soaked overnight and cooked for 1 hour or until soft)
1 Large Sweet Potato (peeled and diced)
1 Medium Potato (peeled and diced)
4 Medium Tomatoes (diced)
1/4 Onion (chopped finely)
2 Cloves Garlic (chopped finely)
2 Bay Leaves
1 Tsp Cumin Seeds
1 Tsp Coriander Powder
Pinch Nutmeg
2 Whole Red Chilies (Dried or Fresh - Seeded)
1 Tsp Smoked Paprika Powder
2 Tbsp Extra Virgin Olive Oil
Whipped Cream (1 spoonful on top of each serving)
Fresh Cilantro (chopped and sprinkled on top, a sprig for garnishing or none if you hate it!)
1 Beef Bouillon Cube*
Salt & Black Pepper (to taste)
Whipped Cream (unsweetened)
*Optional. I used half a cube.
Step 1: Heat up the oil in your soup pot and when the oil is hot enough throw in the cumin seeds and let them pop a bit before putting in the garlic and onion. Sautee a bit and then add the rest of the spices to help them release their aroma.
Step 2: Put in the rest of the ingredients and blend them with the oil and spice mixture well first, and then add the tomatoes.
Step 3: Add enough water to cover the ingredients and lower the heat to simmer it for 1 hour. Add the bay leaves and beef bouillon if you wish.
Step 4: After around 60 minutes taste the soup and add salt & black pepper to taste.
Step 5: Serve with a dollop of whipped unsweetened cream on top and enjoy!
I have memories of eating this sweet in our neighbor's home or at least something like it and this is the first time I've ever attempted making it myself. Not sure if the Burfi I ate was made from almonds or some other nut like cashew nuts, but I do believe it was called Burfi, and to me it was this special sweet that I rarely ever got to eat. When I was given a piece, it was like magic!
Although you can get good Marcona almonds in Spain, I used almond flour because I happened to have some on hand. I mixed the flour with sugar and milk and let it sit for 15 minutes and followed Manjula's recipe for Badam Burfi.
Badam Burfi from Manjula's Kitchen
1 Cup Almond Powder
1 Cup Sugar
1/3 Cup Whole Milk
2 Tbsp Unsalted Butter or Ghee
Pinch Cardamom Powder
Step 1: Blend all the ingredients except the cardamom powder and unsalted butter or Ghee, and let it sit for 10 - 15 minutes.
Step 2: Over a medium heat, melt the butter and then put the almond paste mixture into the pan and keep stirring until it pulls away from the pan. Manjula has a video that will show you what she means by 'pulls away from the pan' if you are in doubt. It will take about 10 minutes for this to happen.
Step 3: Once the mixture starts doing this, take it off the heat, put in that pinch of cardamom powder and keep stirring for another 2 minutes.
Step 4: Pat it out flat onto a buttered dish and embed whole almonds into it if you wish like I did. Then let it rest for 20 minutes. Cut it up into pieces and enjoy with cup of steaming hot tea with lots of milk and sugar in it preferably!
*I guess this is kind of gluten-free?
NOTE: Ramya is right about the sweetness. The original recipe says 1 Cup whole almonds. This means that if you use 1 Cup powdered almonds the proportion of almonds to sugar was more and hence it was not as sweet as a normal Burfi should have been. In short, I'd say reduce the amount of powdered almonds or increase the amount of sugar if you want a more authentic tasting Burfi, but if you prefer less sweetened confections, these proportions will suit you just fine.
I have really been slacking off here. This is mainly due to financial constraints. It's kind of difficult to experiment with interesting ingredients when your household budget says: -3000 euros for January. Never mind 'interesting'. Even buying a few extra chocolate bars makes me cringe, so basically it's just been too restrictive to bake or cook anything that would be good enough for posting. Anyhow, now you know why I've been kind of quiet.
Well, today I was browsing through my Facebook page when I saw David Lebovitz post a link to a recipe for Buttermilk Dinner Rolls by Michael Ruhlman. I decided to give it a go even though I didn't have buttermilk and had to substitute it with a mixture of milk and yogurt. Packets of yeast are 5.5 grams, not 7 grams here and I used 1 packet. I didn't have a thermometer either, so I had use my baking instincts to know when it was ready. I baked mine for 40 minutes on the bottom rack of the oven. Other than this, I pretty much followed the recipe to a tee.
Anyway, here it is. I measured all my ingredients on the scale as stipulated in the recipe, but there is more flour in this as I kneaded the dough on a counter with flour on it. I don't have mechanical kitchen aids so I really do have to do everything with my own two hands. If I make this again I'm going to withhold putting in flour during the first stage and try to use the leftover stuff to knead the dough on the counter.
Taste wise I can't complain. I thought there was a lot of flavor. There was just the right hint of sweet and salty and the texture was a bit doughy, but I won't really count that as a negative. Some people like their bread better if it's a bit doughy, like my sister for instance. Poppy seeds complimented the rolls perfectly. I supposed white sesame seeds or nigella seeds would work, but I really loved it with poppy seeds.
In other words, I have to say that this recipe works out fine.
By the way, my electricity bill for December/January was horrendous. It has been a cold winter, but I probably have been baking way too much!
I am a TCK who has lived in Japan, the Philippines, New Zealand, the USA, the UK and Spain. I am now helping a friend launch her new brand Kimono Tango.


