Wednesday, December 23, 2009

Jim Lahey’s No Knead Baguette (Stecca)


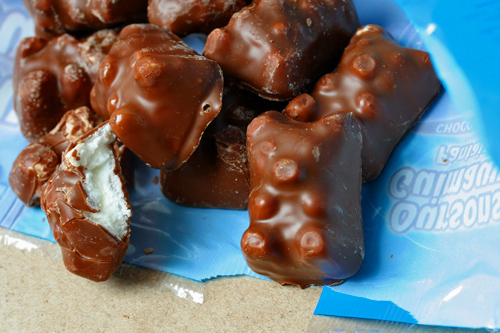
This is from Jaden Hair's blog Steamy Kitchen and the original recipe, I believe, is from here. Christmas is just around the corner, I have no money to squander on shopping and I already have ginger cake, caramel cookies, Ourson Guimauve (chocolate covered marshmallow bears), a box of Crema Catalana and some French pralines lying around. Since everyone else is busy with Christmas preparations and their families, I have nothing better to do than bake or watch reruns of 'Wallander' in Swedish with English subtitles - so what am I going to do?

Bake something savoury!

This was pretty interesting because it was like making a fake sourdough starter and when I woke-up in the morning my sticky ball of dough had swelled up pretty high, had completely lost its shape and I saw a horizon of bubbly exquisitely soft dough sitting inside my plastic bowl. I guess I should have taken a photo of this, but I didn't want my yeast to catch a cold because it's pretty cold indoors in Spain in the winter and so I went right ahead and folded it three times as Jaden instructed and put the dough (which firmed-up nicely) into a clean oiled plastic container for its second rise. I used a spatula instead of wet hands though. It's a technique Ronny uses when making his sourdough bread, which has a much sticker and softer dough than the kind I make.

Did I mention it's been raining pretty heavily here?

Costa del Sol does not have the infrastructure for heavy rain, so when it does rain, it's wise to avoid going outdoors to avoid the floods. Let's not even mention all those careless drivers who do not have rain tires who skid around on the wet streets. Some of these cars used to have tires that could handle the rain, but they're in bad need of getting new tires and they haven't done this because the economy isn't good and the Mediterranean Carpe Diem culture does not entail spending your money on 'safety' first, because it's not really a fun way to spend your money.

To add insult to injury it's Christmas season, so you see - money gets spent on presents and feasting rather than on new tires and it's pretty damn dangerous going outside in the rain here.

Anyway being a glutton I threw caution to the wind and hiked to Torremolinos to buy supplies and took the taxi back as my backpack was laden with kilos of food. It was worthwhile though because I managed to find some pretty nice green olives* at the grocer.

I wasn't too keen on oiling my oven paper, so I dusted it with corn flour instead. After all, the dough was already swimming in extra virgin olive oil during its second rise. Thing is, the oil that I painted the sides of the plastic bowl seems to have drizzled down to create a pool on my dough. Next time I'm going to be careful about using as little oil as possible when 'oiling the sides of the bowl'.

Everything went as Jaden said. The dough was soft and stretchy and I laid them out and embedded them with the goodies and sprinkled them with 'Sal en Escamas' (salt flakes) then...I realized my oven's highest setting was 250C when the recipe called for 260C (500F). Oh well. Next time I buy an oven, I guess I'll just have to buy a better one.

Anyhow they went in and I set the timer on for 15 minutes first to see how they were doing and baked them for a total of 30 minutes. We had these for brunch with some Brie cheese and they were delicious!

I delivered two of the loaves to our neighbor when they were still fresh out of the oven and said 'Feliz Navidad' to them and was rewarded with the lovely smiles on their faces.

*Green olives with pits in them. They come in these plastic containers with yellow handles and I have only ever seen them sold in olive producing countries like Spain. I prefer these to the canned or bottled varieties which you can get in any part of the world these days. I of course removed the pits before I embedded them into my Stecca.

Tuesday, December 22, 2009

Quiche with Broccoli, Goat's Cheese, Mushrooms & Chorizos


We are really having a wet winter - and I'm not complaining because my memory isn't that selective and I do remember what it was like to have been in a drought for 5 years. The constant fear of running out of water wasn't very nice at all, so I welcome the rain.

Anyhow I made this really easy quiche with frozen puff pastry I bought from Carrefour. I got the recipe from my friend Pierre who is in La Reunion as we speak, scuba diving in the deep blue tropical seas away from all the damp and cold.

Although I mentioned 'a recipe' - there isn't really one. He just gave me very vague instructions like: 5 eggs, goat's cheese, chorizos (isn't that what you get in Spain?), bell peppers (or some other vegetable) cream and/or milk, salt, pepper, nutmeg, thyme and follow the instructions on the box of the frozen puff pastry.

Anyway I did a little research on how to make quiche as I had never made one before - just to get a feel for it. It seems some people like to bake the crust for 10 minutes and take it out and put the ingredients in and then bake it, and other people just go right ahead and put the ingredients inside and bake it for 20 minutes or more.

Quiche with Broccoli, Goat's Cheese, Mushrooms & Chorizos

Ingredients

1 Sheet of Frozen Puff Pastry (or make it from scratch if you wish)

5 eggs

1/2 Cup Heavy Cream

5 Mushrooms (sliced)

1 Cup Broccoli (par boiled & chopped)

Emmental Cheese (grated and enough to line the bottom of the quiche)

90 g Goat's Cheese (cut into bite sized pieces)

1/8 Onion (thinly sliced)

Iberico Chorizos (sliced and diced - as many as you think is right)

Salt, Black Pepper, Chili Pepper*, Nutmeg, thyme

*Do not put too much of this. It's meant to be a hidden flavor and should not come out to the fore!

Step 1: Preheat oven to 200C (or whatever the instructions tell you to do). Butter your pan and line it with the puff pastry dough. Trim off edges.

Step 2: Line the bottom of the puff pastry with a layer of emmental cheese.

Step 3: Put the goat's cheese, mushrooms, chorizos, broccoli in there.

Step 4: Beat the 5 eggs and mix in cream and/or milk, nutmeg, salt, pepper, chili powder - and pour this mixture into the quiche. Put the thin slices of onion on top.

Step 5: Bake the quiche for 20 minutes at 200C, then lower the heat to 165-170C and continue to bake for 25 minutes or until firm. Voilà!

Note: My apologies for the bad lighting and out of focus photo, but you get the idea!

Friday, December 18, 2009

Lemon Squares


It's really close to Christmas and I don't have any money to squander this year. I've had to get new blinds installed in my other apartment and paid 90 euros for this, and I had to get a new faucet for my kitchen sink and this cost me 159 euros. I also bought some Christmas presents to send to my family and Ronny's and sent them off and this ended up totaling to over 300 euros (including postage). No wonder I'm short on cash.

Anyhow I've been trying to keep up the holiday cheer by baking lots of things, i.e. cinnamon rolls, brioche, honey cake, saffron sweet buns, etc...and today I made some lemon squares. It's amazing how none of this costs much when you make it all from scratch.

This is a far cry from my life back in Tokyo when I was still working in advertising (and didn't bake or cook at all), but I have to say I kind of like this lifestyle. I like having the time to surf the Internet for recipes, go shopping and bake all these nice things. It's also nice to have a partner to share them with.

Anyhow the lemon squares were quite nice. The recipe is here.

I'm going to post the conversions here in grams, because I have just remembered that I went absolutely crazy trying to figure out what the various conversions were from milliliters to either cups or grams.

The metric measurements are a work in progress. I'm not sure how I managed to make these properly the first time, but they did not turn out quite right with the measurements below. I will experiment a bit more and revise this until I get it right.

Crust

120g AP Flour
40g Confectioner's Sugar
1/4 Tsp Salt (I really don't feel it's necessary to measure these small quantities in grams because unless your scale is accurate, you'll get the wrong amount anyway)
125g Butter (Even though the correct conversion seems to be 113g it does not work. I think I used 125g butter the first time and I'd add more butter if the crust doesn't seem to come together properly. The second time I added 1 Tbsp ice cold water and this did not seem to work as well, and I had to put the lemon squares back into the oven for another 10 minutes because the crust came out soggy.)


Filling


4 Large Eggs
200g Granulated Sugar
30 g AP Flour
170 Milliliters Lemon Juice
1/2 Tsp Baking Powder
1/2 Tsp Salt


Note: I baked mine for exactly 40 minutes at 160C after baking the crust at 175C for 20 minutes the first time. The second time with these metric measurements, I had to put it back in the oven after baking it for 40 minutes, for an additional 20 minutes.

Tuesday, December 15, 2009

Lussekatter (Swedish Saffron & Cardamom Sweet Buns)

Lussekatter are slightly sweet, incredibly soft and fluffy buns spiked with saffron and cardamom. They normally have raisins in them (or are at least decorated with one or two) and are glazed. I was going to glaze mine, but as you can see I forgot!

These are normally baked and consumed on December 13 (St. Lucia Day) which coincides with the darkest days of winter in Scandinavia. The saffron is supposed to symbolize fire (light) to help ward away evil (darkness).

For the recipe, please go to Lucullian Delights. Ilva hails from Sweden and I would consider her recipe to be very authentic. The only thing I deviated from was the amount of yeast I used. As I've mentioned before, don't be too fussy about the original amount of yeast you use. I used 5.5 x 2 = 11 g of dried yeast versus Ilva's 25 g of fresh yeast and it turned out fine.

Unless you are a baking fanatic, remember that yeast is bacteria and when you feed it, it propagates. A slightly lower dose or higher dose of yeast may only mean that it may take slightly longer or shorter for your dough to rise.

My reward for slaving in the kitchen making these? When Ronny came back from the gym and these were baking he said: It smells like my mother's house! Before he went to the gym, he did help me do the last stretch in kneading the dough, by the way - he's like my Kitchen Aid.

Note:  I am going to copy the recipe here as I've noticed now (December 15, 2014) that bloggers keep changing their URLs and it gives me a brain hemorrhage to have to look for the new page.  So here it is.  I hope Ilva doesn't mind.

Lussekatter

11 g  Dried Yeast (5.5g x 2)
200g Butter
500 ml/2 1/2 Cups Milk
1g Saffron Powder
200 ml Sugar
1 Tsp Ground Cardamom
1/2 Tsp Salt
500 ml Flour/6.5 Cups Flour  (approximately)
1 Egg

Step 1:  Put yeast in a bowl with a little warm milk and let it activate.

Step 2:  Add the sugar, caramom and saffron.

Step 3:  Melt the butter in a pan, add the milk (not the one with the yeast in it).  It should not be so hot that your finger burns.

Step 4:  Pour this on the yeast and stir well.

Step 5: Add most of the flour and salt and knead well.

Step 6:  Let it rise for 1 hour.

Step 7:  Lay dough out on  a table dusted with flour and knead it until smooth.

Step 8:  Divide dough into balls slighter smaller than your fist and make 'serpents'.

Step 9:  Put the Lussekatter on baking sheets with parchment paper and let them rise for about 40 minutes.

Step 10:  Whisk the egg and glaze the buns

Step 11:  Bake in a pre-heated oven at 225C/440F for 10 minutes.

Step 12:  Leave them on a rack to cool.

*This recipe is from Lucullian Delights but certain elements have been eliminated.  For the original recipe please go here.

Saturday, November 21, 2009

Brioche


I often have a craving for brioche when Christmas is near, and this year, I decided to make my own because in my part of Spain, bread isn't all that great.

I'm not really a baker and have never made Brioche before, so I looked for something simple and easy and here it was at La Tartine Gourmande.

I had to add some flour to get the dough feeling right, but this is pretty normal when making bread or pastry. You just have to use your common sense and add enough flour until the dough isn't a sticky mess.

Her instructions are very straight forward and she has helpful photographs that reassure you you're on the right track if you're making this for the first time.

I think I needed to lower the temperature a bit or bake it for a slightly shorter period of time, as the top of the brioche came out slightly browner than it should have been. Aside from this, the crust was nice and flaky and the inside was buttery and soft. I have to say I was pleased with the results.

Monday, November 16, 2009

Lemon Poppyseed Muffins


These were soft, fluffy and not too sweet. Last but not least they were very easy to make. I'd definitely make them again. The recipe's here.

I made mine without any lemon rind because I didn't have any organic ones lying around, but the icing with the lemon juice sure gave it enough lemon flavor. I also used almost twice as much yogurt. If the batter seems too hard, I'd add more. If the batter seems soft I'd go easy on the yogurt. Basically you can make your final adjustments on the consistency of your batter with the yogurt.

Monday, November 9, 2009

Multi-Seed Spelt Sourdough Bread


My bread baking so far has been very limited by my inability to procure different ingredients, but a visit from a friend from the UK and my discovery of a Finnish grocer in Fuengirola has made it possible for me to do a few more variations. Further to this I was down for a week with a muscle injury, but now I'm back to my weekly bread baking now.

I used 1 cup of organic whole spelt flour in today's loaf. The starter was 'whole wheat flour heavy' because I mostly fed it on whole wheat flour for weeks. I also kneaded poppy seeds, white sesame seeds, pumpkin seeds and caraway seeds into the dough. The result was a pretty nice looking flavorful bread!

Multi-seed Spelt Sourdough Bread

Ingredients

2 Cups of Sponge (Proofed Starter)
1 Cup Organic Whole Spelt Flour
1 Cup AP Flour + add more flour depending on how wet your dough is
2 Tbsp Extra Virgin Olive Oil
4 Tsps Brown Sugar
2 Teaspoons Coarse Sea Salt

2 Tbsp Caraway Seeds*
2 Tbsp White Sesame Seeds*
2 Tbsp Poppy Seeds*
2 Tbsp Pumpkin Seeds

*Note: I toasted all the seeds with an asterix separately and mixed them. I did not toast the pumpkin seeds. Maybe they should have been toasted too.


Step 1: Mix 1/2 cup AP flour into your sponge to make the yeast happy. Add the sugar and mix it. The very wet dough should be very bubbly and look 'alive'.

Step 2: Mix in all of the spelt flour and then add the olive oil and salt. Keep adding AP flour as you mix it until you've reached the desired consistency. Remember that the wetness of your sponge and flour varies in absorbency, so trust your instincts on when to stop adding more flour. I tend to work with a soft wet dough in the beginning, because I end up sprinkling it with more AP flour as I knead it anyway. Once the dough is thoroughly mixed and is somewhat solid (not a liquidy mess), let it rest for 25 minutes covered with a cloth. At this stage you haven't done any hardcore kneading yet, but have just 'blended' the ingredients.

Step 3: Knead/fold the dough 100 times or so and let it rest for 30 minutes.

Step 4: Repeat Step 3.

Step 5: Repeat Step 3 again.

Step 6: After kneading the dough for 3 rounds, let it rest covered with a cloth until it doubles in size. This may take 2 hours or longer. It depends on how strong your starter, how warm your room is and how humid it is. So, again, trust your eyes. If the dough has doubled in size, it's time for the next step.

Step 7: Punch the dough down and mix in the seed mixture minus 2 Tbsps of it which you will use to decorate your loaf later.

Step 8: Roll the dough into a loaf and set it on a sheet of oven paper dusted with coarse corn meal and cover this with a cloth and let it double in size.

Step 9: When your loaf is nearly double in size, pre-heat the oven to 230 C.

Step 10: Right before your loaf is about to go into the oven, brush the top with water and sprinkle the remaining seeds on top of it.

Step 11: Bake at 230 C for 20 minutes with steam and then for another 25 minutes at 210-220 C. I use a casserole dish filled with boiling water to create steam.

Sources:

Sourdough Baking by S. John Ross

100% Spelt Levain Bread


Multigrain Seeded Bread

Sunday, November 1, 2009

Scalloped Lemon Dill Potatoes


Today was an unusually overcast day and the photography session on my kitchen counter did not go well. I guess if the lighting is bad enough, not even Photoshop can salvage it. I was going to show you how lovely this looked before it went into the oven, but I guess we'll just have to be satisfied with the final results.

This is a very simple recipe you can make with an extra boiled potato that you had leftover from yesterday...because you boiled too many of them...or you can boil on afresh if you really want.

Scalloped Lemon Dill Potatoes

Ingredients

1 Big Potato Boiled with its Skin On

Fresh Dill

2 Cloves Garlic

Extra Virgin Olive Oil

Lemon Salt (You can make it with fresh lemon rind and salt if you wish)

Black Pepper

Chili

Coarse Spanish Paprika

Step 1: Preheat your oven to 250C. Get your biggest casserole dish and line it with oven paper.

Step 2: Slice the potatoes as thinly as you can and then lay them in one layer in the casserole dish.

Step 3: Sprinkle with lemon salt, black pepper, fresh dill, chili and paprika.

Step 4: Make another layer on top and do the same thing.

Step 5: Drizzle extra virgin olive oil and place 2 garlic cloves on top.

Step 6: Roast in oven for 30 minutes or until the top layer has browned a bit and looks crispy.

This would make a nice side dish for a lot of things but I have to be honest. I just had this with eggs & Kalles on the side. This was my Sunday morning brunch!

Friday, October 30, 2009

Turkish Delights


This week I didn't make my sourdough bread because I'm still suffering from a stiff neck due to some strained muscle from kneading too much dough. I can't turn my neck to the left without feeling pain in a (pulled?) muscle in my neck connected to some muscle in my back/chest - so this really wasn't the best time to try making something I'd never made.

Thing is, the recipe seemed straight forward enough with a little corn flour and a little sugar, etc. I didn't think this little experiment would turn into something that would remind me of what they made Oscar Wilde do in prison!

Anyhow the recipe I used wasn't perfect as it failed to mention some crucial instructions (or omitted something) and if you didn't put the candy batter through a sieve (or so something that was unmentioned), you ended-up with solid lumps of corn starch inside your soft candy. I put some of mine through a makeshift sieve aka a tea strainer - but seriously it was so hard to do I gave-up after I'd done this with less than half of it.

The candy sat in these oil lined small containers with wrap in them overnight and then I cut them and dusted them with a mixture of corn starch & sugar the next day. After I tried some exactly the way they were supposed to be, I tried adding a small amount of green tea powder into the dusting mixture and this turned out to be a very nice thing to do, because it offset the somewhat cloying sweetness. For some reason, when you dust Turkish Delights (flavored with lemon and orange flower water) with green tea powder - the flavor of the green tea really comes alive - more so than if you painted some vanilla cookies with green tea frosting. It wasn't such a bad combination with the lemon and orange flower essence either.


Anyhow I'm not posting the recipe as I believe it was an incomplete recipe that needed some more details. For those of you who would like to try - I suggest you consult a Turkish friend who has a grandmother who still makes these at home!

Addendum: I found this recipe just now. This recipe tells you to boil the mixture until all the lumps are gone, and uses more water. I'm not sure this will work, but it does make sense as your mixture will be much more diluted so you'd be able to boil it more and let all the bits of starch dissolve.

Wednesday, October 28, 2009

Escapade Philippine à Paris


Recently I was invited to an event in Paris with my dear friend Victor Magsaysay cooking.

The venue was:

La Cuisine Paris
89 Boulevard Saint Michel
75005 Paris

He played with some provincial Filipino recipes and refined them to make some stunning presentations using all these lovely fresh ingredients purchased in the markets of Paris.


The execution was decidedly eastern, with a nice western polish to them.


What can I say? I'm sorry I missed this event because I was still waiting for my residency permit authorization to come in.

Read more about this event and Victor here.

Special thanks to Yusuke Kinaka for allowing me to use his photographs in my blog.

Menu

Inspirée d’authentiques marchés philippins

Entrée

Beruyà ng Arayat
Papaye verte, taro et crevettes croquantes en beignets
vinaigre épicé de noix de coco

Plats

Pinakbet ni Paras
Papillote de légumes exotiques

Pusò ng Saging at Isdâ
Salade de fleurs de bananier rôties et rouget grillé

Bistek Tagalog
Carpaccio de boeuf sauce soja,
oignons confits et calamansi


Tous les plats sont servis avec du riz au jasmin
en papillotes de feuilles de bananier

Dessert

"Dirty Ice Cream" et Confit Dàgani
Glace au lait de Chèvre avec jeunes noix de coco,
kombava et muscovado en confit

Monday, October 19, 2009

Spelt Flour Sourdough Bread


This is my attempt at incorporating spelt flour into my weekly sourdough baking.

I've been looking at incorporating different grains and seeds into my bread because when you have bread around the house all the time, it can get a bit boring to have the same bread week after week. A German friend had suggested using spelt flour and I happened to find 500g of it at a health food shop in Torremolinos so I snapped it up and it was there sitting in my cupboard waiting to be used.

It was a good thing I did some minor research before I embarked on this attempt as it seems spelt flour has different properties from regular wheat flour. Although it has a much higher protein content which is nice, it apparently has weaker gluten which means that you have to modify your bread baking a bit. Apparently you can overknead spelt whereas this isn't easy to do with wheat flour. I suggest you stop kneading the bread when you think the dough feels good rather than sticking to a fixed time or number of folds any recipe stipulates.

As usual I prepared my bread according to S. John Ross's recipe, but I also incorporated some elements from The Fresh Loaf. Shiao-Ping's baking is very precise and I'm sure that if you followed her instructions to a tee, your bread would be stellar, but I just pulled out easy to incorporate elements into my routine because following every detail was a bit too overwhleming for me.

The only modification I made to S. John Ross's recipe was that I let the bread rest and knead/folded it 3 times before I molded it into a loaf for the final proofing. I also wet my hands when I kneaded/folded the somewhat harder dough (due to the spelt?) to keep it from sticking to my hands. I did this alternately with dusting it with a bit of AP flour.

Anyhow, my spelt flour seemed to absorb water more readily than AP flour (even though spelt is supposed to be less absorbent), so I only added 1 cup AP flour and 1 cup spelt flour to the starter to form my dough this time. The type of spelt flour I used was organic and unbleached.

Further to this, I thought I'd try baking this loaf with a preheated oven and used Shiao-Ping's baking temperatures and times. This meant baking the bread with steam for 20 minutes at 230C and then baking it for another 25 minutes at 220-210C. Before the loaf went into the oven, I dusted it with a bit of AP flour.

The result?

The bread had a much thicker, crunchier crust with a lot of flavor.

However, as a result of introducing too many variables, I'm not sure whether it was the repeated kneading/folding, the preheated oven, the spelt flour or a combination of all of these that created this nice thick pleasantly crunchy crust.

Maybe someone can enlighten me.

Note: I feed my starter sometimes with whole wheat flour and sometimes with AP flour. Sometimes it's half and half. Because I fed my starter with 100% whole wheat flour last week, the starter itself was already pretty thick and dark when I started.

Monday, October 12, 2009

Sweet Potato & Rucola Salad with Fresh Valencia Orange Juice & Extra Virgin Olive Oil


Sweet potatoes are standard fare in Japan and some other parts of the world, but they are really not a favorite in Europe. They are difficult to come by in some countries and are compared with regular potatoes and snubbed at. I've heard people say:

"I prefer potatoes."

But hey, it's not like you're going to marry one of them so you can surely eat one without giving-up the other?

To me, potatoes and sweet potatoes are two different things that can be appreciated in different ways.

I'm quite happy roasting sweet potatoes with their skin on and eating them, but I came-up with this recipe because I thought there had to be other ways of enjoying this nice tuber.

Sweet potatoes are much more nutritious than regular potatoes and loaded with beta carotene and also contain a healthy dose of vitamin C, manganese, copper, dietary fiber, vitamin B6, potassium and iron. You can compare the nutritional value of sweet potatoes with potatoes here.

I used a Valencia orange but it's not really relevant where your oranges come from. Any nice juicy orange will do. The flavors marry very well and you'll notice that each flavor like notes in good music will come alive, enhancing each other to another level of goodness.

Sweet Potato & Rucola Salad with Fresh Valencia Orange Juice & Extra Virgin Olive Oil

Ingredients

Rucola aka Arugula or Rocket

1 Medium Sweet Potato - thinly sliced

Onion (Red Onion if you have any) - sliced thinly

30 g Manchego Cheese (or as much as you wish)

1/2 Valencia Orange

Black Pepper

Coarse Sea Salt

Extra Virgin Olive Oil

Sunflower Oil


Step 1: Thin the sweet potato very thinly and deep fry it in sunflower oil. Lay them on paper to remove excess oil.

Step 2: Wash the rucola and put them in your salad bowl, tossing in the sweet potato crisps.

Step 3: Toss the salad with salt, pepper, extra virgin olive oil and the juice of 1/2 orange.

Step 4: Garnish with shavings of Manchego cheese and thinly sliced onions.

Note: I used white onions but if you have red onions, use these for more color.

Saturday, October 10, 2009

How to Control Pesky Bugs in your Cupboard

I've been browsing the Internet for reliable sources on how to do this and finally found something here.

Some guides tell you to clean your cupboard with bleach or even use insecticides, but I didn't really think using poison in a place where you keep food was a good idea and had some serious doubts about bleach. The Department of Entomology of Iowa State University states that it's not a good idea to use insecticides in an area where you store food and that "washing shelves with detergent, bleach, ammonia or disinfectants will not have any effect on insect pests". They recommend "freezing for 1 week or heating in a 140 degree oven for 15 minutes" and vacuuming your cupboard and getting rid of the vacuum bag which could turn into another colony of insects. Store everything inside airtight containers.

For more detailed information, you might browse here.

Bugs in food freak out a lot of people (and to be honest they freak me out a bit too), but try to look at the bright side. If bugs can survive in your flour, dried fruit or herbs, it means your flour/dried fruit/herbs are not so pesticide laden that no larvae could possibly survive.

I've seen more bugs inside flour and other food, than I ever have since moving to Spain and guess what? It was really easy to make sourdough starter with the flour here.

Monday, October 5, 2009

Swedish Cocoa Balls with Amaretto


I don't know if these are really Swedish but Ronny says so, and the part where they put oatmeal into the mix seemed Swedish enough to me.

The original recipe uses coffee and not Amaretto. It's something Swedish moms make with their kids and since the kids end-up eating most of it, and kids have this amazing ability to be able to binge on sweet things, they probably didn't want the kids to get too 'high' on both sugar and alcohol. After all, it's supposed to be healthier when you're eating stuff you made with your mom than when you just buy packaged junk food.

I'm sure people have different rules about alcohol in food for their kids, so I leave it to your discretion what you feed your own children, but for the sake of propriety, I'll say that this recipe is for adults because it has Amaretto in it.

When Ronny first made these (with coffee), I thought they were like 'Rum Balls'. My recipe was an American one but having talked to a German friend about these, it seems they make 'Rum Balls' in Germany too. He tells me the ingredients are rum, chocolate and sugar...woohoo! Anyhow I just had to remake these with some kind of alcohol in it because although I don't drink much I do love using alcohol as a ingredient in cooking.

Anyhow, here's my modified recipe for Swedish Cocoa Balls 'for Adults'. I loved the use of oatmeal as it's the only somewhat healthy ingredient in the mix. The rest is almost pure butter and sugar!

Ingredients

150 g Butter (at room temperature)

2 dl Sugar

3.5 dl Oatmeal

1 dl Dessicated Coconuts + some extra for coating the balls

1 1/2 Tsp Vanilla Sugar

4.5 Tbsp Cocoa Powder

2-3 Tbsps Amaretto (or Coffee if it's for kiddies)

Step 1: Set the butter in a bowl and let it melt down to room temperature. Mix in the sugar until you have this nice creamy sugar & butter mixture.

Step 2: Add the rest of the dry ingredients, then add in as much Amaretto as you think is necessary for the mixture to hold together. I used 2 Tbsps Amaretto.

Step 3: Roll the balls in dessicated coconut and coat them evenly. Put them inside a Tupperware in a neat row.

Step 4: Cool the Cocoa Balls in the freezer until they are firm. Enjoy!

Sunday, October 4, 2009

Spicy New Potato & Green Bean Salad (Warm)


I guess this is a standard, but I've revised the basic recipe to suit my own taste buds. I wanted something with a crispy, crunchy texture and bursting with flavor....so here it is:

Ingredients

20 Unpeeled New Red Potatoes (halve the bigger ones)

20 Green Beans (cut into bite size lengths)

Onion (a few very thin slices will do for flavoring)

1 - 2 Big Garlic Cloves (crushed)

2 Tsp Coarse Sweet Paprika Powder

1/2 Lemon (the juice of)

2 Tsp Parsley (chopped)

Rosemary

Parmesan Cheese

3 Tbsps Extra Virgin Olive Oil (you don't have to measure this, but you get the idea)

Chili Powder

Black Pepper

Coarse Sea Salt

Step 1: Preheat oven to 250C.

Step 2: While the oven is heating-up slice the bigger new potatoes into two. The smaller ones can be whole. The whole point of this is to make all your cute little potatoes uniform in size.

Step 3: Coat the potatoes in salt, pepper, rosemary, olive oil, chili powder and coarse sweet paprika. Put the crushed garlic into the casserole dish with the potatoes, and roast them in the oven for 60 minutes or until nice and crisp on the outside.

Step 4: Chop a handful of parsley and slice your onion. Use very little onion as you just want a touch of onion flavor and you don't want it to dominate.

Step 5: When you think your potatoes are almost ready, bring some salted water to boil and parboil your green beans. I put the beans into the water and when the water comes to a boil again, they're ready.

Step 5: Toss the roasted potatoes and green beans together with the rest of the ingredients. Grate some Parmesan cheese into the salad and squeeze some lemon juice.

You'll find that the tang of the lemon juice along with the flavor of roasted garlic, chili, sweet paprika, black pepper, extra virgin olive oil and salt will deliver that nice feeling of 'bursting with flavor' and be a perfect compliment to the crispy skin of the roasted potatoes and the crunchiness of the green beans!

If you have some fresh rucola, you might try garnishing the salad with them.

Thursday, October 1, 2009

Sourdough Bread with Nigella, White Sesame & Fennel Seeds


I bake bread once a week when I do 'starter' maintenance and this one was sprinkled with nigella seeds, white sesame seeds and fennel. I toasted everything separately prior to sprinkling the dampened loaf with the three types of seeds. I did this right before my loaf went into the oven.

The basic sourdough bread recipe I use is here. I, however used brown sugar instead of white sugar this time*, and put a casserole dish of boiling water in the oven for the first 15 minutes and then removed it. I baked the bread for a total of 50 minutes.

Looks nice doesn't it? The combination of the 3 types of seeds worked beautifully and I'd definitely make this again!

*I've been using honey as it imparts a more complex flavor to the bread than refined white sugar and this time I tried using brown sugar which works beautifully.

Tuesday, September 15, 2009

Peanut Butter Oatmeal & Walnut Cookie Bar with Maple Syrup


I've been wanting to do a variation of one of Trish's very tempting cookie bars for sometime, but didn't get around to it until now because I had trouble finding very basic ingredients like graham crackers or some other item that was pretty integral to the recipe. Check-out what Trish has done with her Peanutty Oatmeal and Pecan Cookie Bar which was adapted from a recipe from My Baking Addiction.

I really liked Trish's idea of making cookie bars out of this cookie recipe and though her modifications were good just as they were, I made further modifications due to the unavailability of certain ingredients. I used maple syrup instead of molasses and chopped up pieces of dark French chocolate instead of using peanut butter chips. Note that I only used 100g of dark chocolate, whereas the original recipe calls for 1 cup.

I didn't reduce the amount of chocolate because I was trying to be healthy here, but thought that 1 cup was too much - and believe me the bars were sweet enough with only 100g of dark chocolate in it. As for the other ingredient substitutes versus the original recipe, let me say that the cookie bars were most likely enhanced by the use of 100% brown sugar and whole wheat flour. I'm pretty skeptical about brown sugar and whole wheat flour being that much healthier anyway so if I thought AP flour and refined white sugar would have made it taste better - believe me - I would have used the latter.

I 'heart' Trish for her adaptation of this recipe. It was just one of those moments in life where someone had a moment of 'genuis' and managed to make something that was already good even better.


Peanut Butter Oatmeal & Walnut Cookie Bar with Maple Syrup

Ingredients

1/2 Cup Butter (115 g)

1/2 +1/3 Cup Brown Sugar

1/2 Cup Peanut Butter

1/2 Tsp Vanilla Extract

1 Tbsp Maple Syrup

1 Egg

1/2 Cup AP Flour

1/2 Cup Whole Wheat Flour

1 Tsp Baking Soda

1/4 Tsp Sea Salt

1/2 Cup Rolled Oats

100g Chopped French Dark Chocolate*

25 Walnut Halves

Step 1: Preheat oven to 175 C (350F).

Step 2: Cream the butter and brown sugar.

Step 3: Stir in the egg, vanilla extract and maple syrup with a wooden spoon. Add the peanut butter. The batter will be quite firm so a flimsy beater won't really do the job.

Step 4: In a separate bowl, sift the flour, baking soda and salt and mix this into the batter.

Step 5: Stir in the oatmeal and pieces of dark chocolate.

Step 6: Line a baking tray (23 cm x 23 cm) with baking paper and pat the dough into the tray so that it's evenly distributed and evenly place 5 x 5 walnuts. Press them in firmly.

Step 7: Bake in the oven for 26 minutes.**


*Any dark chocolate you like will do. I don't like Spanish chocolate at all so I try to buy chocolate that's made in France.

**The baking time may differ depending on your oven. Estimated baking time can range anywhere from 20 - 28 minutes.

Thursday, September 10, 2009

Brie, Mushroom & Ham Pizza


Since I'm slacking off, I'm going to keep it simple. This isn't really a recipe, but just a winning combination of toppings for a pizza!

I first brushed the pizza dough with extra virgin olive oil and sprinkled some coarse sea salt sparsely over it, after which I made a nice layer of Brie cheese. Then I put sliced button mushrooms over this, followed by pieces of ham and thinly sliced onions. I topped this off with some mozzarella cheese.

That's it - and Ronny loved it. I'd say this is definitely 'guy' food...unless your guy has issues with Brie cheese or mushrooms.

Tuesday, September 8, 2009

Yogurt Pancakes


I've been seriously slacking off on writing posts in my blog and I'm going to blame the hot weather as well as the fact that I'm in the middle of renewing my residency permit right now. I guess I've just been too worn out from the heat and stressed out to be inspired to cook.

Here's a very simple pancake recipe. It's based on a recipe for old fashioned pancakes which was scribbled on a cooking card belonging to Dakota Kelly's grandmother, and I've modified it a bit and used yogurt in it.

Yogurt Pancakes

Serves 2-3

1 1/2 Cups Flour

3 1/2 Tsp Baking Powder

1 Tsp Salt

1 Tbsp Sugar

1 Cup Milk

1/2 Cup Yogurt

1 Egg

2 Tbsp Butter (Melted)

Step 1: Sift the dry ingredients into a bowl and make a well in the center. Add the rest of the ingredients and mix well.

Step 2: Use a ladle to make the pancakes on a hot griddle.

Step 3: Enjoy!

Note: If the batter seems dry add milk or yogurt to desired consistency.

Friday, August 28, 2009

Tianshui Inspired Chinese Stir Fry with Pork, Italian Peppers & Onion


I have been reading The Romance of the Three Kingdoms since I was 27 or so and in my mid-30s, I visited China to see the birthplace of a certain general who I especially admired. He came from the north western area of China - from Tianshui - which was a gateway to the silk road in those days, and as we neared his home town - we saw restaurants sporting Halal flags.

The market stalls, unlike those we saw in Beijing or in Inner Mongolia did not have solid roofs but had rough linen awnings, and they served a smoky flavored tea with rock sugar and dried fruit in it - and you knew that the culture in this area had been touched by something from a culture further west of the Taklamakan desert.

I was more focused on history than culinary pleasures at the time, but luckily my mother and our wonderful guide who we called 'Kee' were food obsessed, and Kee found a little restaurant in the little town in Gangu County where they served this delicious stir fry of bitter melon and pork. Kee being from Xian was a snob and apologized for the 'country' cooking and said this was the best he could do, but it was wonderful country fare and more delicious then some of the food we were to have later on in Cheng Du. This was served with a bowl of freshly cooked rice and a Cilantro Salad. The Cilantro Salad was nothing more than fresh cilantro tossed in dark sesame oil and salt - but Key told us it would help restore our appetite in the sweltering hot summer weather and it did the job.

We asked him how to make this salad and Key informed us that the important thing was to toss it with your bare hands, which some of you may find appalling, but he said it was integral that you do this as the warmth from your hands would help the flavors blend properly.

Anyhow, I never got the recipe for the pork stir fry with bitter melons and have not encountered this dish outside of this area. I mean you will find pork stir fry with bitter melons in Chinese restaurants, but I have tried them and it's not the same dish as the one I had in Tianshui.

The recipe I'm going to share today is a recreation of this dish, made with Italian peppers and onions instead of bitter melon which I can't get easily in Costa del Sol. There used to be a store that would order bitter melons for me but sadly the owner had to go back to China because of family issues and with her went my supply of bitter melons.

Tianshui Inspired Chinese Stir Fry with Pork, Italian Peppers & Onion

Serves 2

Ingredients

3 - 4 Fatty Pork Chops (preferably pork collar)

1 Onion

1 Italian Pepper

1 Tsp Sichuan Peppercorns

3 Tbsp Extra Virgin Olive Oil or White Sesame Seed Oil or Dark Sesame Seed Oil*

For the Marinade:

1 Tbsp Soy sauce

1 Tbsp Dry Sherry or Shaoxing Wine**

Sea Salt

For the Sauce:

3 - 4 Tbsp Chili Bean Paste

1-2 Tbsp Oyster Sauce

1 Tsp Soysauce

1 Tsp Dry Sherry or Shaoxing wine**

1/2 Tsp Sweetened Soybean Paste or Black Bean Garlic Sauce

1/2 Tbsp Brown Sugar

Step 1: Dice the onion and peppers into bite sized pieces and put them into separate containers ready to throw into your Wok or frying pan that can heat-up to really high temperatures. Do not use a frying pan that won't heat-up to higher temperatures because you can't make stir fry with these kinds of pans.

Step 2: Cut the pork chops into bite sized rectangular pieces and marinate these inside a bowl with soy sauce and dry sherry/shaoxing wine. I've written approximate amounts of this above but only use enough to dampen the bits of pork. The amount of soy sauce, wine and salt you need will depend on the size of your pork chops. Sprinkle some sea salt on the pork and blend it a bit with your hands (or with a kitchen utensil) and let it sit for 30 - 60 minutes. If you don't have time to do this - 15 minutes will do. This step isn't critical so I wouldn't worry about it so much.

Step 3: Put the ingredients of the sauce into one bowl and have it ready for use. This is important as speed is integral to stir frying which is done at very high temperatures. Do not start frying the ingredients and try to put the sauce together later - because your stir fry will be ruined.

Step 4: Before you start stir frying anything make sure your rice will be ready in 15 minutes or so. Basically your rice has finished cooking already at this stage and is sitting there absorbing moisture and settling down already. I let mine sit for 30 minutes with round grain rice so this means the rice has been cooked and has been sitting there for 15 minutes already. This is when I start cooking the stir fry.

Step 5: Now put your wok or frying pan on the stove and max out the heat. Put the oil in and let it heat-up until it's smoking and then throw in the Sichuan peppercorns until the aromas have been released, then put in the pork and stir fry them until they're nicely browned. When the pork is done remove these to a bowl or plate.

Step 6: In the same pan (and add more oil if needed - but if you do this let the oil heat-up again before frying the onions) stir fry the onions first until they are a bit brown or a bit caramelized on the outside layer. If you are using the right kind of frying pan and do this at max heat, the onions will still be crisp even though they are a bit browned and this is what you're aiming for.

Step 7: Throw in the diced peppers and stir fry this until they are coated in oil. These don't really have to cook so as soon as they are glistening with oil and you can put the pork back into the pan. Quickly put the 'sauce' we have prepared into the pan.

Step 8: Now stir fry this until the aroma of the raw sauce changes to a more pleasant aroma and all the bits of vegetables and pork are glistening in the caramelized sugar (which was inside the sauce).

Serve immediately.

Let me reiterate here that your stove should be at max heat the whole time and that you should prepare all your ingredients before you start stir frying anything. The key to making a good stir fry is speed. If your ingredients stay in the pan too long the vegetables will wilt and lose their crunchy texture and the pork will become dry.

Notes:

*In Japan I used to use a mixture of white sesame seed oil with a touch of dark sesame seed oil for flavor. Again, I'm using extra virgin olive oil here which isn't something one uses in Chinese cooking frankly, but I live in olive oil country and the quality of olive oil is exceptional - so I use this rather than the inferior varieties of sesame seed oil I can get here.

**The quality of dry sherry in Southern Spain is exceptional and has an aroma similar to good quality Shaoxing wine which is why I opt for this instead of the real thing. Use which ever is easier to procure in your area. Don't use a sweet sherry for this.

Sunday, August 16, 2009

Grilled Salmon Steak with White Wine Saffron Sauce with Prawns


Yesterday was my birthday and because I was kind of lazy about going out - Ronny cooked dinner for me instead. The warm weather tends to take away my appetite and yesterday was one of those days when I felt like eating something light like shrimp or prawns. What you see is much heavier than a shrimp cocktail and I only ended-up eating half the salmon steak...but it was delicious.

Ronny tells me it's quite common to serve salmon with a white wine sauce in Sweden and decorate it with shrimp or prawns boiled in dill to give it a nicer flavor, but Ronny likes to put the prawns inside the sauce and he spiced it up with some fragrant Spanish saffron to give it more depth in flavor.

I'm going to share his recipe for the sauce because I'm assuming you all know how to grill salmon steaks and cook rice.

Ronny's White Wine Saffron Sauce with Prawns

Ingredients

3 dl Fish Broth

2 dl Cream + 1 dl Whipped Cream

1 dl Dry White Wine + more to taste

125 mg Spanish Saffron

30 g Unsalted Butter

2 Tbsp Flour

1/2 Lemon (the juice)

400 g Boiled Peeled Prawns (500g with their peel on)

Sea Salt

Step 1: Put the fish broth, cream and wine in a saucer and simmer until it's been reduced to half its volume.

Step 2: Mix the butter and flour in a bowl until it forms a thick paste.

Step 3: Add the flour paste into the sauce and blend thoroughly.

Step 4: Add the whipped cream and saffron and blend.

Step 5: At this point make sure the sauce is smooth and add salt and more wine to taste, then add the boiled prawns. Add the lemon juice bit by bit to taste. We used the juice of half a lemon but yours might be bigger and have more tang.

Tuesday, August 11, 2009

Pseudo Sushi & the Avocado


I don't understand why there is even a debate about a substitute for traditional Sushi ingredients when we already have the avocado. Since Ichiro Mashita the Sushi Chef at The Tokyo Kaikan tried substituting avocados for Toro, the avocado has become standard fare for Sushi...outside Japan.

Since the basic premise for Japanese cuisine is using the freshest ingredients in season - why even think about eating raw fish in inland areas faraway from the ocean? During my days as a production coordinator for television commercials I remember how the Japanese staff from Tokyo would cringe at the thought of eating Sushi deep in the mountains somewhere in some rural town. I guess the American crew just thought they should be eating Sushi since they were in Japan because it was the vogue in those days to do this, but well....fresh saltwater fish deep in the mountains where the hotel didn't even have decent toilet paper? Then after not heeding the advice of the Japanese coordinators that it wasn't a good idea to eat Sushi at all, the American crew would invariably complain that the Sushi wasn't good as the Sushi in New York.

I'm sure it wasn't and they put way too much sugar in the rice and I thought it was disgusting.

People from Tokyo are awfully proud of their Sushi, but if you ask the fishermen in the small fishing villages, they'll turn their noses up in disgust because the fish is 'half-rotten' according to them. These people are used to fish as fresh as can be you see.

Anyhow what you see in the photograph is not Sushi because the rice needs to have vinegar in it to be called Sushi and I don't like vinegar. It's just glorified rice balls rolled in toasted sesame seeds, garnished with a slice of ripe melt in your mouth avocado marinated in lemon juice and drizzled with a mixture of Wasabi and soy sauce. The green stuff you see on top of the avocado are chives.

I often eat what the Japanese call Temaki Zushi (which is pretty much DIY Sushi at the table), and I just use freshly cooked rice. Avocado, wasabi, soy sauce and toasted sesame seeds is a golden combination that makes an excellent substitute for real Sushi and this is how I get my Sushi and Sashimi fix when I need it.

Friday, August 7, 2009

Oriental Rucola Chicken Salad


I've had a craving for Japanese food these past few days and have been eating odd things like avocado seasoned with Wasabi and Soysauce wrapped in seaweed paper with toasted sesame seeds, finely chopped leeks, cucumbers and fluffy freshly cooked round grain rice.

This salad is what I have when I need a quick fix of something that tastes 'Japanese'. You can pretty much put any vegetable in it although peppers are a bit too strong and may clash with the Wasabi Soysauce dressing.

Oriental Rucola Chicken Salad

Serves 2

Ingredients

Rucola

1/4 Cucumber (thinly sliced)

1 Ripe Red Tomato (diced)

1/4 Red Onion (thinly sliced)

1 Ripe Avocado (diced)

4 Small Chicken Fillets (fried and shredded)

3 Tbsp White Sesame Seeds (toasted)

2 Tsp Wasabi

3 Tbsp SoySauce

Extra Virgin Olive Oil

Salt

Black Pepper

Step 1: Fry the chicken filets seasoned with salt and black pepper in extra virgin olive oil until they are golden brown. Set them aside.

Step 2: Toast the sesame seeds inside a pan.

Step 3: Assemble the ingredients in a salad bowl. Toss the diced tomatoes and avocaod with the Rucola and then put the cucumber slices on top.

Step 4: Pour the dressing over it. I pour a nice glug of extra virgin olive oil over the salad, and then pour a mixture of Wasabi and soysauce over it.

Step 5: Decorate this with the red onions and top it off with chunks of shredded chicken. Sprinkle with the toasted sesame seeds and serve.

*Rucola=Arugula=Rocket

Saturday, August 1, 2009

Transplanted Baker


I found this cute little parcel in my mailbox today from Transplanted Baker. Siri had asked her readers to post their favorite summer dessert and she was giving away a Bjorklund Soft Cheese Slicer. It's quite common to do 'giveaways' in food blogs these days but since this is the first time I've won anything I thought I'd post it. Don't we all love getting presents?

Siri is "A pie-lovin', bread-risin', apron wearin' expatriate living the good life on the west coast of Norway". I've been reading Siri's blog for quite some time now, and I think she's a great writer. She comes across as a sincere person and she always manages to make me smile, or even laugh. As a person who has been 'transplanted' more than once myself, I guess I can also relate to a lot of her thoughts.

Tuesday, July 28, 2009

Roasted Stuffed Tomatoes with Tuna & Spinach Pesto


I love pesto but have only been able to make it once from scratch because I usually can't get enough fresh basil leaves. The 'pesto' you see in the photograph isn't really pesto. It's made with a similar technique but with different ingredients. I wasn't sure how good it would be but the handful of fresh basil leaves I added at the very end seemed to bring it all together and it turned out to be quite delicious.

So long as your children don't have an aversion to 'green food', this is a great way to hide spinach as they won't taste it. The trick is to put enough garlic, parmesan cheese and basil leaves to mask the flavor.

Natural ingredients vary so trust your own tongue and add a little more of whatever you think is necessary as you make this. The recipe isn't that fussy so long as the nuts are ground down properly, so if you feel you need to add a little more parmesan cheese, garlic or basil leaves, go ahead and do it.

Spinach Pesto

Makes approximately 1 Cup

Ingredients

2 Cups Fresh Spinach Leaves

A Handful of Fresh Basil Leaves

1/3 Cup Marcona Almonds*

1/2 Cup Parmesan Cheese

1/2 Extra Virgin Olive Oil

2-3 Garlic Cloves

Salt & Black Pepper to taste

Step 1: Pulverize the marcona almonds first and then add the spinach, basil, garlic, parmesan cheese and pulse.

Step 2: Add the olive oil, salt and pepper and pulse. Add more oil, salt & pepper if necessary.

Basically, even though more precise directions are given in making pesto normally, you can just throw everything in and let the food processor do its job. The only thing I was careful about was making sure the almonds were pulverized properly because you don't want bits of almonds ruining the texture.

So now you've got your Spinach Pesto ready but what is that tomato?

Roasted Stuffed Tomato with Tuna & Fresh Spinach Pesto

4 Servings

Ingredients

4 Medium Sized Tomatoes

1 Can Tuna (80g)

Salt

Black Pepper

Extra Virgin Olive Oil

Step 1: Slice the tops of the tomatoes and use a spoon to remove everything inside. Set the contents inside a bowl.

Step 2: Mix the tuna with the tomatoes and season this with salt, black pepper and extra virgin olive oil.

Step 3: Stuff the tomatoes and top them with the mixture in the bowl, top them off with emmental cheese, and bake in a preheated oven at 200C for about 30 minutes or until the cheese on top is nice and golden.

Step 4: Put a generous mound of the spinach pesto on top and garnish with a sprig of fresh basil.

*Use pine nuts if this is an option. Pesto should be made with pine nuts, but although I can buy Marcona almonds easily in Spain, pine nuts are very expensive and not of very good quality usually.

Wednesday, July 22, 2009

Sesame Sourdough Bread


Is it too warm for baking bread? The wild yeast don't think so. They were very happy yesterday and when I was proofing the sponge I was pretty excited about the rise I was going to get from the dough already.

To make this bread, I pretty much followed S. John Ross's basic sourdough recipe but improvised a bit and before I put the bread in the oven, I brushed the top of the loaf with cold water and sprinkled sesame seeds on it. I also put a casserole dish filled with boiling water at the bottom of the oven and removed it after 15 minutes.

Reminder: Do not preheat the oven. Turn the oven on to 176C/350F, after you put the bread in.

Baking time was longer than usual. It took 55 minutes for this loaf.

This was an interesting lesson for me because I found out why baguettes have those slits on top. It's to control where the breaks happen instead of letting it happen randomly like I did.

Tuesday, July 21, 2009

Mushroom, Spinach & Blue Cheese Pizza with Caramelized Bacon


This isn't really a recipe. It's just a combination that worked pretty nicely so I'm going to share.

Mushroom, Spinach & Blue Cheese Pizza with Caramelized Bacon

Ingredients

Pizza Crust Dough

Extra Virgin Olive Oil

Mozzarella Cheese

Fresh Spinach Leaves

Onion (thinly sliced)

Blue Cheese

Button Mushrooms

Bacon (chopped up into bits)

Brown Sugar

Red Chili Powder

Black Pepper

Step 1: The only preparation is the part where you fry the bacon in its own oil and you season it with copious amounts of freshly ground black pepper and a liberal dose of red chili pepper. When it starts looking pretty nice and crisp, sprinkle this with brown sugar and toss it until it's glistening in the caramelized brown sugar.

Step 2: Brush the pizza dough with extra virgin olive oil and make a layer of mozzarella cheese on it.

Step 3: Put two layers of baby spinach leaves on it and then sprinkle this with the caramelized bacon bits.

Step 4: Put the sliced mushrooms, thinly sliced onions and slices of blue cheese on top and bake.

This obviously is not a good idea for anyone on a low sodium diet for obvious reasons, but those of us who aren't fussed about sodium also need to pay attention to the amount of bacon and blue cheese we use because it can get pretty salty - so use both ingredients sparingly. It's integral that you spice-up and caramelize the bacon because the spicy sweetness is what makes this combination work.

Monday, July 20, 2009

Boiled Chinese Dumplings & Deep Fried Goat's Cheese Dumplings


Shui Jiao or boiled Chinese Meat Dumplings are really mid-winter fare and not something you really want to eat in the summer - but we turned on the air conditioner and made them anyway. We had some leftover wrappers so we wrapped some goat's cheese in them and deep fried them.

Shui Jiao (Boiled Chinese Meat Dumplings)

Ingredients

Wrapper - Buy some ready made ones or make your own like we do. We use Yohana's recipe.

300 g AP Flour

3/4 Cup Boiling Water

1/4 Cup Cold Water - but you probably won't be using all of this!

1 Tbsp Vegetable Oil - we use extra virgin olive oil because we're in Spain

Filling

250 g Ground Pork

2 Leeks (finely chopped)

4 Cloves Garlic (crushed)

1.5- 2 Inch Knob of Ginger (grated)

Sea Salt

Black Pepper

1 Tbsp Soy Sauce

1 Tbsp Dry Sherry* or Shao Hsing Wine

1 Tbsp Dark Sesame Seed Oil - if your pork is very lean add more

Condiments

Chili Bean Paste

Soy Sauce - I prefer Japanese soy sauce

Cilantro (chopped)

*I use ALFONSO Oloroso Seco Palomino from Gonzalez Byass, because this contains the right notes in it similar to Shao Hsing wine.


Step 1: Put the AP flour into a bowl and then pour the boiling water over it. Stir vigorously until it's all blended. Mine always looks like when I'm making pie crust or something. You'll see lumps of dough. It won't have a smooth consistency nor will it be gluey.

Step 2: Add a little cold water (but not all of it!) and mix some more until you think it's cooled down enough to handle with your hands.

Step 3: Knead the dough with your hands a bit and add 1 Tbsp oil and keep kneading it until it's a smooth resilient ball. If you absolutely think the dough needs more water add a little bit again. You have to be careful about the amount of water you add, because if you add too much water, it will increase kneading time exponentially. I once had to knead the dough while watching Prison Break because I added too much water and you don't want to do that. This is the only part of this recipe where you need to exercise good judgment. The rest is really easy.

Step 4: Once you have a smooth ball of resilient dough, wrap it up in plastic and let it sit for at least 30 minutes. I usually let mine sit for a few hours. This means you can make this a few hours in advance so that you have less work to do later on in the evening.

Step 5: When you're ready to start boiling the dumplings, use the big pot you use to boil pasta in normally and fill it up with water and put the heat on. While waiting for this to heat up you can start preparing the filling and rolling-up the wrappers.

Step 6: In a medium sized bowl, mix the ground pork, chopped leeks, crushed garlic, grated ginger, soysauce, salt, black pepper, dry sherry and dark sesame seed oil. Mix this using a kitchen utensil or your hands if you're brave. If your ground beef is very lean add more sesame seed oil. Go easy with the soysauce and sherry because you don't want the filling to be soggy. Set this aside.

Step 7: Now roll the wrapper dough into a log (4cm diameter) and cut it up into 35 or so portions. Basically each piece of dough when rolled out should be the size of a commerical dumpling wrapper. You don't have to be too fussy about the wrappers not being perfect circles because freshly made wrappers are much easier to handle and you can pull them into shape as you make your little dumplings. Here's a tutorial on how to do it on Jaden Hair's site.

Step 8: When the water is boiling I like to throw in leftover pieces of leftover ginger (from when you grated the ginger - you know how you end-up with a piece you can't grate without grating the skin off your fingers?) in the water to flavor it nicely - you can boil your dumplings. Boiling time is supposed to be shorter than with commercial wrappers but I'm paranoid so I boil mine for 15 minutes. If you think the raw pork will cook faster, then you can shorten this time to 5-10 minutes.

Step 9: Remove them and serve with Chili Bean Paste, soy sauce and chopped cilantro (and maybe thinly sliced scallions or leeks if you want).

We had the deep fried goat's cheese dumplings as a starter. These are great for cocktail parties because they make great finger food.

Sunday, July 19, 2009

Shrimp Pesto Pizza


It's been hot in Costa del Sol, and when the temperature closes in to 40C there is this strange sensation of sitting near a wood stove during the winter, because of this omnipresent scent of something like burning wood or pine needles in the air, and you can feel the heat in your face, except that you're walking outside in the open air and it's not cold at all and just mind blowingly hot. I'm not going to be ridiculous and even use the word 'warm' because who is anyone trying to kid in this kind of weather? It's not warm anymore at 39C. It's damn hot...so hot that when I walk indoors again I feel like I don't even have to turn on the air conditioner because the coolness radiating from the marble floors of my home is soothing enough. That's how hot it is these days.

This is pretty much my excuse now for being remiss about cooking. I do bake sourdough bread every Monday and make tomato sauce and do other basic things to ensure I'm eating well, but I really don't feel like doing much more than that.

So here's something nice and easy for those of you who are also wilting in the heat. Nothing special and I'm sure many of you have made some version of this before, but it's a delicious classic nonetheless, and very easy to make.

Shrimp Pesto Pizza
1 Pizza - Serves 2

1 Portion Pizza Dough

500g Boiled Shrimp/Prawns (shelled)

Pesto Genovese

Mozzarella Cheese (shredded)

Extra Virgin Olive Oil

2 Cloves Garlic (Crushed)

1 Dried Red Chili

Step 1: Marinate the boiled, peeled prawns in extra virgin olive oil, crushed garlic and dried red chili for at least 30 minutes.

Step 2: Roll out the pizza dough and put a layer of basil pesto on it.

Step 3: Put the marinated shrimp all over the pizza.

Step 4: Sprinkle mozzarella cheese over the pizza and bake in the oven for 20 minutes or however long it takes your pizza to bake.

We used the recipe we always use from the old Cook's magazine and purchased boiled shrimp, which we peeled and then marinated, and Buittoni's fresh pesto (the kind that needs to be refrigerated), but if you have fresh basil growing in your garden, pine nuts and parmesan cheese - by all means - make your own pesto. Unfortunately in my part of the world, it's not easy to come by large amounts of fresh basil leaves, so making pesto would require that I grow my own basil in huge quantities on my sunbaked balcony first!

Some people have suggested putting other things on this pizza but if you're a shrimp/prawn lover believe me - you'll love it just the way it is....and this is why we've put 500g of shrimp on one pizza.